|
|
Create A Bootable Windows XP Installation CD Slipstreamed with SP1
Now that Service Pack 1 (SP1) has been released for Windows XP a lot of people have been updating their systems. In fact, a lot have been doing clean installations followed immediately by applying SP1 to eliminate much of the garbage that has collected over the past year of using XP. There really isn't a downside to reformatting and doing a clean install, but if there was one I suppose it could be that the installation of SP1 might be quite time consuming, especially if you do it through Windows Update. However, there is a way to reduce this time expenditure.
If you fall into the category of users that frequently reformat their systems and clean install XP from the CD then creating a slipstreamed version of XP/SP1 can be a huge time saver. You invest the time once and then on subsequent reinstalls you avoid bringing XP up to SP1 speed via Windows Update downloads and installations. You will still have to get the post SP1 updates from Windows Update, but the time saved will still be worthwhile.
What Is A Slipstreamed Installation CD?
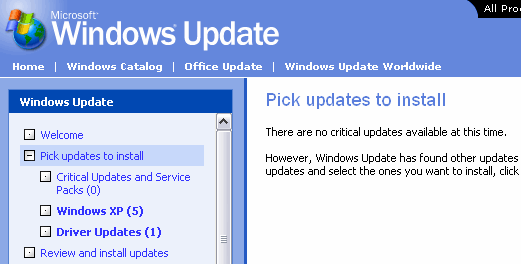
Think of your installation CD as providing a stream of data to your computer to set up the operating system. On the day XP was released the data stream was up to date and current. As months have gone by, upgrades and fixes have been issued to make your system more stable and secure. SP1 is a compilation of those updates and fixes. Slipstreaming 'slips' these new bits of data from SP1 into the 'stream' of data that the original CD provided, effectively merging the two into one XP Installation CD ROM. A slipstreamed CD is used just like any other Windows installation CD. Without a slipstreamed CD when you go to Windows Update you might find 15 - 20 Critical Updates are needed. The screen capture below was taken immediately after an installation of XP Pro made from a slipstreamed XP/SP1 Installation CD created from the instructions contained in this article. As you can see, no Critical Updates or Service Packs are needed due to slipstreaming SP1 into XP.
Creating A Slipstreamed XP/SP1 Installation CD
Gathering the Needed Parts and Pieces
There are a few essential items necessary to successfully create the slipstreamed CD. You will need:
-
The original Windows XP installation CD ROM - The new CD can be created from either the Home or Professional version of Windows XP. If your computer came with an OEM version of XP it can also be used.
-
Windows XP Service Pack 1 - It will be necessary to either download SP1 or obtain it on CD. To slipstream, you need the full SP1 which is a 133MB download available here.
-
CD Creation Software - A burning program for your CD-R or CD-RW drive that allows creating bootable CD's. Unfortunately, while XP does come with the capability to burn CD's built in, the software it uses is not suitable for this task. Since the majority of my readers here seem to be using Roxio Easy CD Creator I've used it in the tutorial, but the instructions can be adapted to other burning software.
-
ISO Buster - Used to extract the boot loader image file for the CD. It's a free download here.
Building Directories
The first step is to build a directory structure to hold the files that will be used in the CD creation process. It's a simple structure, requiring nothing more than a main folder with three sub-folders. It doesn't matter what names you use for your structure or where you locate them on your hard drive, but most users find drive C the easiest. I used the structure shown below, located on Drive C. Create whatever folders you are comfortable with or use the ones below if you want to cut and paste commands later in the tutorial. Whatever your choice, it's the relationship between the components that's important, not the naming of the parts.
|
Copying and Extracting Files
- The first step is to insert the Windows XP CD and copy the entire contents into the SS-Root folder or the equivalent folder in your structure.
- The second step is to navigate to where you downloaded the Service pack 1 file. If you downloaded SP1 from Microsoft it should be named xpsp1_en_x86.exe. Copy the file to the XP-SS folder and then rename it to xp-sp1.exe after the copy operation completes.
(If you are using the CD of SP1 the files should already be extracted. Copy them into the XP-SS folder)
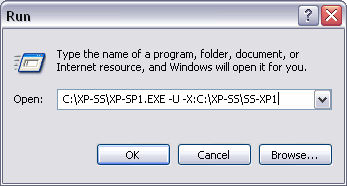
- Use the Run dialogue shown below to extract the contents of the Service Pack to the previously created SS-XP1 folder.
The Run dialogue box is accessed from [Start] [Run]
The
command to begin the extraction is: C:\XP-SS\XP-SP1.EXE -U -X:C:\XP-SS\SS-XP1
-
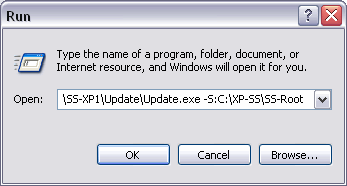
Apply the extracted Service Pack 1 to Windows XP in the SS-Root folder using the [Run] dialogue box.
The Run dialogue box is accessed from [Start] [Run]
The
command to apply the Service Pack is: C:\XP-SS\SS-XP1\Update\Update.exe
-S:C:\XP-SS\SS-Root
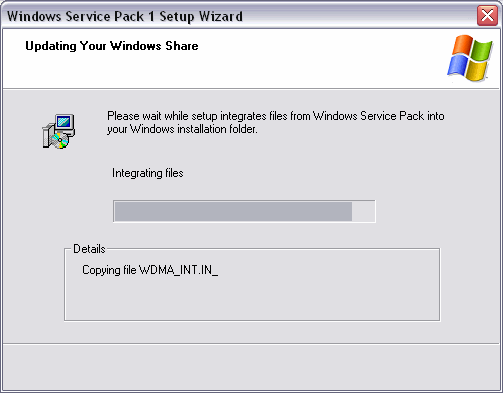
As shown below, Service Pack 1 is being integrated into the Windows installation folder.
Successful completion of the integration process.

-
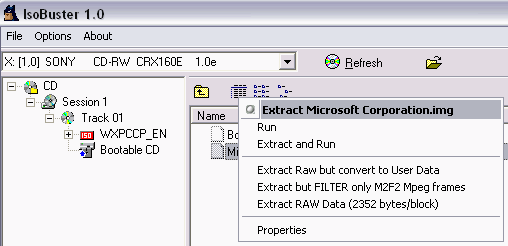
In order to make the new CD bootable it's necessary to add the file Microsoft Corporation.img to the folder SS-Boot we created earlier. There are a number of ways to do this but the easiest is to use ISO Buster With the Windows XP CD in your CD drive, open ISO Buster. Click on Bootable CD in the left pane then right click Microsoft Computing.img in the right pane, finally clicking Extract Microsoft Corporation.img file.
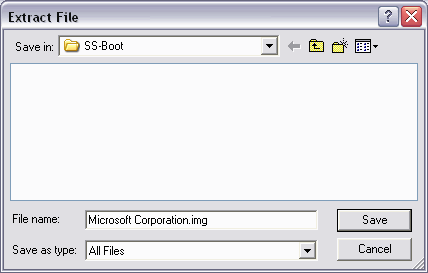
Extract the file to the SS-Boot folder previously created or your equivalent.
Setting Up the Burning Software
With the preparation out of the way it's time to actually burn the new CD. There are a number of different burning or CD creation programs that can be used to accomplish this task, but since a large majority of users seem to favor Easy CD Creator by Roxio I'm using it for this guide. The terminology and screens may vary depending on your program choice but the principles remain the same and can be easily adapted.
-
Load the Easy CD Creator program.
-
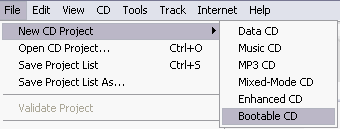
Select [File] [New CD Project] [Bootable CD] from the menu
-
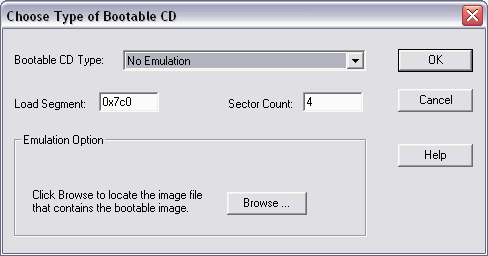
Set [Bootable CD Type] to No Emulation
-
Set [Load Segment] to 0x7c0
-
Set [Sector Count] to 4 (Failing to set Sector Count to 4 will make the CD unbootable)
-
Click the [Browse...] button
-
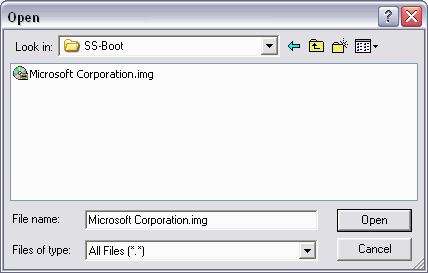
Navigate to the SS-Boot folder and select the Microsoft Corporation.img file then click [Open]
-
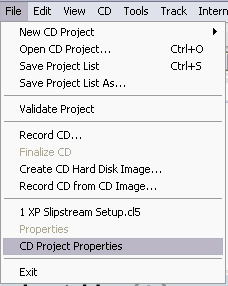
Select [File] [CD Project Properties]
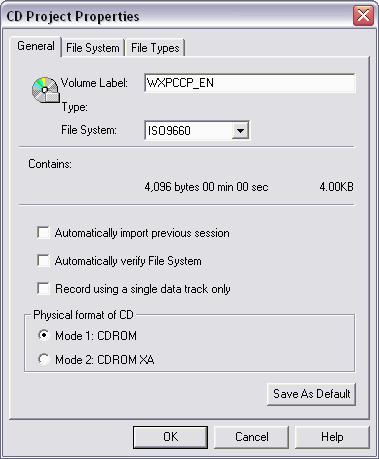
The General Tab
-
Set the [Volume Label] field depending on your Windows XP version.
-
If you have Windows XP Professional enter WXPCCP_EN
-
If you have Windows XP Home enter WXHCCP_EN
-
If you have Windows XP Professional OEM enter WXPOEM_EN
- If you have Windows XP Home OEM enter WXHOEM_EN
-
-
Set [File System] to ISO9660
-
Set [Physical Format of CD] to Mode 1: CDROM
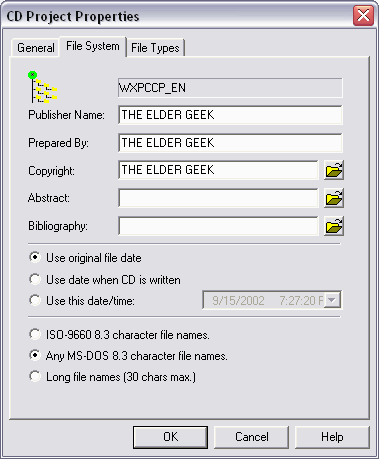
The File System Tab
-
Set [Publisher Name:] [Prepared By] and [Copyright:] fields to your choice of information.
-
Select the radio button next to [Use original file date]
-
Select the radio button next to [Any MS-DOS 8.3 character file names]
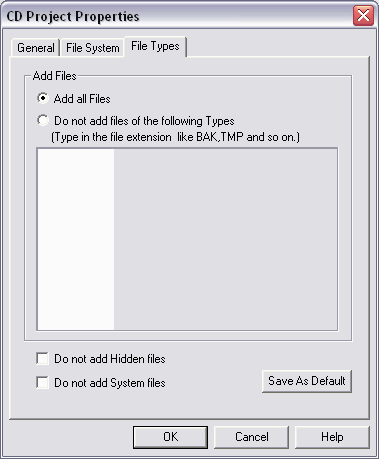
The File Types Tab
-
Select the radio button next to [Add all Files]
-
Remove any check marks from [Do not add Hidden files] and [Do not add System files] selections.
Click [OK] to exit the CD Project Properties selection
screens.
Adding The Files To Be Copied
-
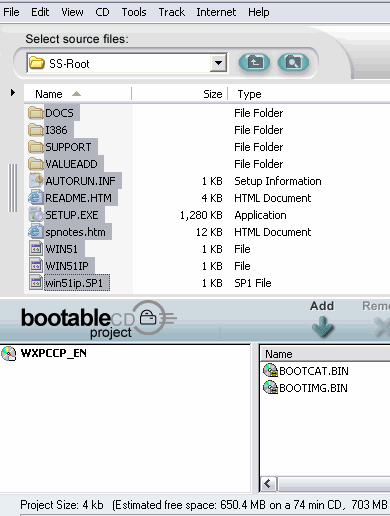
Set the [Select Source Files:] drop down selection list to SS-Root or your equivalent folder. Click on the first file in the list, hold down the Shift key and click on the last file in the list to select all the files and folders in the C:\XP-SS\SS-Root folder.
-
Click the [Add] Button
-
Click the [Record] button
![]()
Setting The Record Options
-
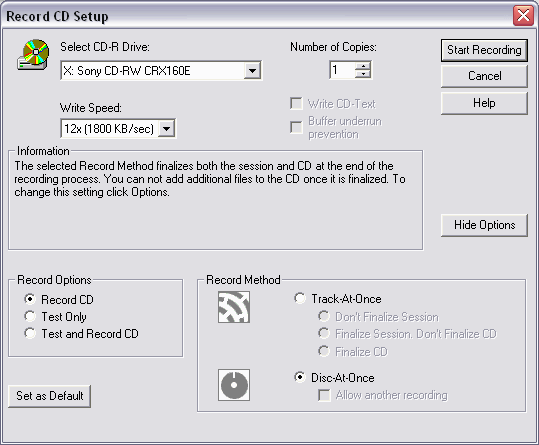
Set [Record Options] to Record CD using the radio button
-
Set [Record Method] to Disc-At-Once using the radio button
-
If you want more than one copy change the [Number of Copies] field but I'd advise against it until you've created and tested the first copy. You can always save this setup after the burning is completed if you want to create additional copies at a later time.
-
Click [Start Recording] button.
Burn XP, Burn !
The Record CD Progress screen will open and allow visual monitoring of the burning process. A few notes are in order relating to insuring a successful burn.
-
Before you start the burning process close all other programs. Burning a CD can be very processor and memory intensive and there is no sense in taxing the system more than necessary. Even I can avoid FreeCell during a CD burning session and I'm a FreeCell addict.
-
If you use a screensaver, disable it before the burning process as an extra precaution. The same applies to your anti virus software if it starts scans or updates automatically.
-
How long the burning process takes will vary widely depending on your system and the CD burner speed. It may not appear like anything is happening at times, but be patient and more than likely all will be fine.
-
If the burn does fail, especially because of a buffer problem, reduce the speed of the burn and try again.
Congratulations !
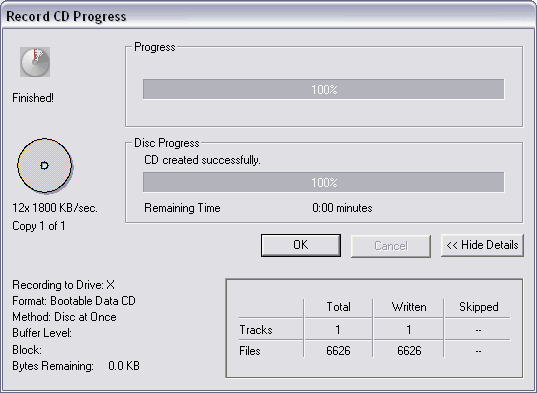
When the screen above appears you have successfully burned a slipstreamed XP/SP1 CD ROM.
Once you click [OK] after the burn is complete the window below will appear. If you want to save the settings that were used to burn the CD in case you want to burn another copy at a later date, click [Yes] and you'll be prompted for a name to save the file under for later reference. Otherwise, click [No] and exit Easy CD Creator.

